Science in a Teacup?

This summer I’ve been reading “Storm in a Teacup: The Physics of Everyday Life” by Helen Czerski. I love it so much! In the book, Helen describes everyday situations that we all have experienced and shows us how to view them through the lens of science. It opens our perspective and as she says, turns the world into a “playground!” Here is a reading from the first page. It is actually p. 3 in the book (not p.1) but it is the first paragraph.


Floating and Sinking

Do you ever feel that you are sinking in science class? What does it take to stay afloat? Well, this year in 8th grade science you are being asked to start swimming! Take over control of the lab activity by reading and following the directions and working independently! In our floating and sinking lab it was up to the students to figure out how to make a clay boat float on water. It was a real challenge but by the end we learned that it was all about the buoyant force. The buoyant force pushing up on the boat could be increased by making a boat with a deeper and wider bottom giving it a larger capacity to displace water. By expanding your own mind, thinking more deeply, and stretching out your self confidence you are going to float to the top in science class this year! Stay buoyant everyone!

Measurement of Mass and Volume

We are exploring matter using measurements of mass and volume. Did you know that when two different liquids are mixed, the new volume can actually be less than the sum of the original volumes? 25 mL of water and 25 mL of rubbing alcohol only measured 48 mL when they were mixed together. The mass didn’t change because we didn’t lose any atoms or molecules. Mass is a measure of the amount of matter but volume is just the space that is taken up by matter.


Edcamp Philly: Intro to Passion Based Learning

In Jen and Christy’s session on passion based learning, everyone could see the importance of helping students develop their passions and learn how to apply inquiry based learning to explore their own ideas. The session mostly focused on how to accomplish this goal while still covering the curriculum. Many ideas were shared so that teachers will be able to start a passion based project in their own classes.
First we learned about the projects that Jenn and Christy had going in their classes. They used various techniques to help students get started and formulate a question. They encouraged students to choose questions with no real endpoint. They give the students templates that help them narrow their questions. Christy shares examples of first grader questions and 10th grader questions with her students and tells them that their questions should be somewhere in between. Students track their goals and progress using a google form. The teachers also model the process for their students. The students are graded on the process rather than the final projects to emphasize that the process is even more important. They keep blogs which are graded so writing is a focus.
I would like to apply what I’ve learned to my science classes. Students can choose an area to study in physical science. I may have two different inquiry levels such as a curiosity level and an exploratory level. I can create a spreadsheet like the one Jen used to track student progress. Here is a template to track student goals. Jen has the students keep track of the conferences on a worksheet so that she can listen carefully and then they can reflect on what was said. It reduces her record keeping and increases the effectiveness of the conference.


Ordinary to You, Extraordinary to Someone Else

Edcamp Philly Session Link

https://docs.google.com/document/d/1hBuRgLqiup0L90LzlgxyYCnd7giIqP5foYYL8EOFLtw/edit

What would happen if students and teachers truly understood the importance of their ideas? Instead of wondering if their ideas were any good, classroom innovators would be sharing their experiences and learning from others. Teachers at EdCamp Philly were able to do just that on Saturday as they met to discuss what was working in their classrooms and find out what other educators were doing. In the session, Ordinary to You: Extraordinary to Someone Else, Brooke and Christy got us thinking with an inspiring video by Derek Sivers, click here for video. In it he points out the we are a “bad judge of our own creations” and so need to let others see what we are working on.

Teachers are sharing in many ways. Christy shared that she began tweeting out what her plans were for the week’s activities and was surprised when other teachers asked to join her group virtually. Teachers can print out their photo-stream and create a display such as the “180 days of Awesome” wall. At one school, the administrator did away with typical faculty meetings and instead the teachers stood in a circle and shared what was working in their classes. One teacher brings her entire class to join with another class in order to share a technology lesson with that teacher in a friendly, collaborative way. One group uses an Edmodo class to share the ways they were using technology in their classrooms. What seemed insignificant to those teachers was, in fact, inspiring to others who heard these ideas. Everyone agreed that there are certain obstacles to sharing such as a lack of time and confidence. After this session, however, we were all motivated to up our efforts and find ways to facilitate sharing at our schools.

Locations of visitors to this page


Teaching Students to Use New Technology: Modeling then Discovery

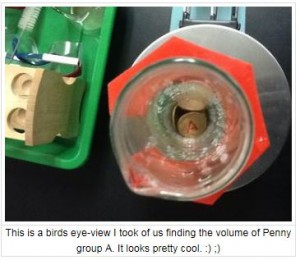
Suzie's Penny LabWhen I introduce a new tool to my students, I do so by modeling the tool. By using a wiki to give them notes, for example, I was able to show them how a wiki can be used to organize information and to share in editing. Now they are adding lab summaries and digital artifacts to their own wikis.  I let them figure out how to do this, and as a few students uncovered the secrets, they shared them around the classroom from lab table to lab table.  We all helped each other and I would throw in the occasional direct instruction for those who hadn’t caught on. It may not be the quickest way to implement new technology in the classroom but the students take pride in problem solving and discovering their own answers. This picture was posted on Suzie’s lab page on our wiki. She is including artistic photographs of her lab experiments. Would this have happened if I had given very specific instructions? I believe students find their creative sides when they are given the chance to discover technology on their own. Click the picture to see her wiki page.

Smart Boards and Google Drive

Click Here For The Class Notes!

For the past few years I have found many ways to use the Smart board in my math and science classes.  The notes from class can be saved and shared with absent students or printed out for students who struggle with note taking.  In addition, however, it is easy to make the notes accessible online for all of the students. The “export” function allows a teacher to save the notes as a pdf or even as a Power Point. If the blog you are using doesn’t let you embed a presentation (this blog charges for the Pro plan but Kidblogs, Edmodo, and Wikispaces are free), you can simply paste the link on your page. I paste my links on a calendar on my School Wires page. Check it out here.

Block Head Physics

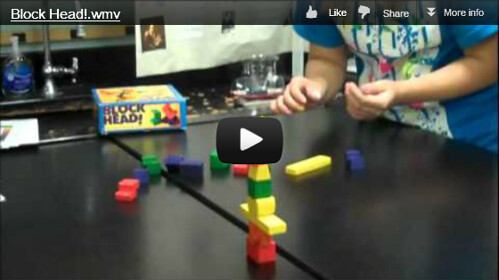
Motivating students to keep up the learning can be difficult as the end of the school year approaches!  This week I used the old “make it a game” trick to engage students in their physics lesson.  The game Block Head! is a simple block stacking game which can be used to teach the concepts of forces, motion, and center of gravity.  We begin by playing a round of Block Head! while writing observations in our lab notebooks.  The goals is to develop the super-secret-winning-strategy for use in the upcoming tournament.  Students play the game but their moves are not well thought out and they have a hard time predicting how their choice of block will work on the stack.  To help them apply physics to the game, we stream a movie clip from Discovery Education called, “Inquiring Minds: Bodies in Motion,” which teaches the students about center of gravity.  The kids take notes, we discuss the examples, then it’s back to the game to test out what we learned!  Before long the students are making some pretty amazing stacks of blocks that seem to defy gravity!  When students see that they can apply what they have learned in class to do better in a game or in a sport, they begin to see the practical value in science.

Tablet Time

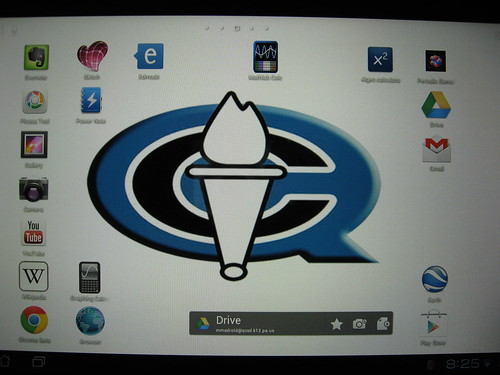
I’ll admit I was a reluctant learner when it came to using tablet computers in the classroom.  I didn’t see the point of a computer that had to be held and didn’t have a keyboard.  I know you can add a keyboard and a case that props up the tablet but then why not use a netbook? Recently I was asked to give an ASUS tablet a try in my 8th grade science class.  At first I played around with the tablet and wasn’t sure how it could be used.  Then I gave the tablet to the students and watched what they did.  It took a while but now I can describe a way to use a tablet in the classroom that goes beyond just using apps.

The tablet has it’s own student Google Apps account so I used that to make it a Picassa account where the students can send the pictures it takes.  During class I choose the lucky students that get to use the tablet and they take pictures of the class activities.  They use Skitch to annotate the pictures and send them to Picassa where they are immediately available to the other students on the laptops or netbooks.  If they take videos, the students upload them directly to our You Tube channel and then they can be embedded in their lab group wiki pages.

I  installed the Evernote app which the students can use to access their accounts.  Many of my students use Evernote to create their digital notebooks.   For social networking in class we use Edmodo.  The Edmodo app seems limited but they can use Edmodo right from the browser on the tablet.  They can also  log in to their Google Apps account from the browser to create and edit documents and presentations.

In addition to using Skitch to annotate pictures, it can be used as a white board.  Students can create graphics that are easily used in other programs.  They can make drawings to illustrate a lab procedure, for example, then easily upload the picture to their lab group wiki page.  When working on balancing equations, one student used Skitch to show her work.  That image can then be saved and added to her digital notebook.  Students have a choice of making their digital notebook as a Google Presentation, Google Doc, Microsoft Word document, or Evernote notebook.  The pictures from Skitch can be used in any of these.

We also use the tablet for study games on Quizlet.com and Quia.com where I have flashcard sets and quiz games that I have created over the years.  The students can use the browser to get to these sites for extra practice with our curriculum.

We’re off to a good start and the students love using the new tablet.  It is a tool that does many of the same things as a netbook but it is easier to work with movies and pictures and can also function as a whiteboard with the benefit of being able to keep the picture as a graphic.  It is a nice addition to our lab even though we only have one to use.  The students pass it around the room and it keeps their interest!

 

The Un-Service Day

Many people have been attending a new type of conference lately called an “unconference.”  These conferences pool the ideas and expertise of the attendees to create sessions in which everyone is expected to share what they know.   Today my school district held an “Un-service Day” which was not the typical inservice that we are all used to!  District employees were asked to submit session ideas based on their own knowledge and skills.  A list went out to the faculty and staff and we all were able to choose the sessions we wanted to attend.  Session materials were posted on a wiki so that we could have access to all of the resources.  http://qcsdapril242012.wikispaces.com/  We also used a hashtag on twitter, #qcsd424, and we posted comments throughout the day.

My colleague, Laura, and I presented a session on using SMART boards and clickers to engage adolescent students.  We had a small group but I really enjoyed putting our ideas together.  We had fun creating the SMART lesson that we used for the session and the group of teachers that attended had a great conversation about what is needed to help children learn.

During the day I also got to attend a workshop on Google Docs, Blackboard, and SMART Notebook.  I have already begun implementing some of the things I learned in these sessions!  For example, I have created a self evaluation rubric using Google Forms so that the students can check and revise their work prior to turning in their assignment.  I posted the form on Edmodo and the students will be able to revise their rubric submission after they make revisions to their project.

One of the nicest things about the day was the positive atmosphere.  Everyone felt the benefit of contributing their ideas and gaining new information from their peers.  I would love to know if anyone else gets to do a similar type of professional development in their school districts.  What was the best PD that your district has offered?